Paving the Way
Paving the Way
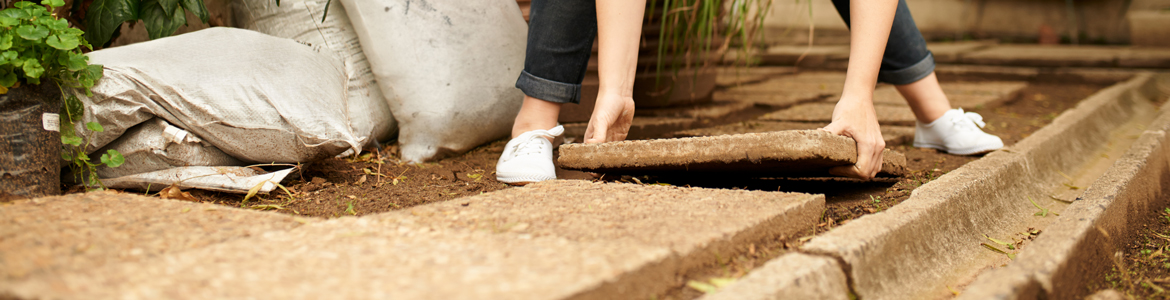
There’s nothing like the feeling of doing something yourself, and with our easy how-to guide to paving (and a little bit of elbow grease), you’ll be on the path to DIY paving pride in no time.
First things first. What kind of paver should I choose?
If you want a paver that’s low-maintenance, long-lasting and doesn’t stain easily, a stone paver is your best bet. For the budget-conscious, concrete pavers are a great alternative. Also keep in mind the type of paving pattern you’d like. Certain patterns may require more cutting, therefore taking more time and costing more. As with anything in the home and garden, it’s all about personal style - so pick what you think will best suit your space and your style. We've got a massive range of pavers to choose from at Flower Power!
How many pavers do I need?
This depends largely on two things - the size of the area you're working with and the size of each paver itself. For square or rectangular shapes, it's simple - multiply the length and width (in metres) and that will tell you how many square metres your space covers. If you're working with an irregular shape, a great idea is to split it into smaller sections and work the area out from there. You can even draw it up onto grid paper if that helps! Once you know the square metreage of your space, bring that info to your local Flower Power, where our friendly landscape staff will work out exactly how many of your chosen paver you'll need to fill the space.
Hot tip: It's not always possible to match paver colours and patterns from lot to lot, so we always recommend ordering more rather than less. Ordering 5% over the square metreage of your area will help to cover any accidental breakage or cuts required to complete your pattern. Having a few leftovers will also come in handy if ever you need to replace a paver or two in the future.
How to: DIY paving in 10 steps
Preparing the ground
The preparation is the most important part of laying your pavers. Get this part wrong and chances are your paving will look lumpy and uneven. Here's exactly how to get it right!
- Identify the area you want to pave.
- To ensure your pavers are laid straight, run a string line along the edge of your paving area. This can be done by hammering a peg into the ground and tying a string around it.
- Begin by adding a layer of road base gravel 100mm thick. Using a rake, spread it out evenly.
- On top of the road base layer, add a layer of river sand to a thickness of 25 to 30mm. Screed level the sand with a screed rail to ensure your base is perfectly level – this will stop your pavers from wobbling.

A string line is a must for level paver placement.
Laying Pavers
There's more to the art of laying pavers than just popping them down anywhere.
- Choose the pattern you want to lay your pavers in. A simple offset pattern is ideal - not only do basic patterns look great, they also help add to the strength of your paved area. If you're a DIY beginner, there are three main patterns we recommend - herringbone, basket weave and stretcher bond (brickwork).
- If any border of your paved area isn’t flush against a wall, you’ll need to find a way to stop the edge from falling away, so that your pavers don't move too much. A great idea is to use metal garden edging, such as LinkEdge or Shapescaper, to create a solid edge for your paved area. Alternatively, you can use a mortar haunch (which is a mix of sand and cement).
- If your pattern is going to involve any cuts, leave them until the end to fill in. You'll likely need to use a brick saw for this part, or alternatively, an angle grinder with a diamond masonry blade. Remember to wear the appropriate safety gear when cutting your pavers!
- Lay your pavers down and secure by tapping each paver with a rubber mallet. Use a spirit level to make sure they’re even (hopefully you’ve done your preparation, so your pavers will lay evenly). Check each paving course (row) with a string line to ensure all paving lines are straight. Not sure where to start? We recommend starting at your front corner and working out from there, to minimise the amount of cuts you'll have on the front edge of your paved area.

These three patterns are great for DIYers.
Setting & sealing pavers
So you've laid your pavers - now comes the important task of keeping them in place!
- Once you’ve laid out all your pavers and you're happy with how everything is looking, use a broom to sweep gap sand into the pavers to set them. Leave for 24 hours before proceeding to the next step.
- After your paved area is set, it's time to clean and seal. We recommend sealing all pavers to ensure their longevity, keep them looking fresh and protect against stains. It's important to choose the right sealant for the type of paver you're using to ensure best results - chat to our friendly landscape staff who will be more than happy to guide you in the right direction in terms of sealant choice and the required preparation.

Sweeping in some gap sand will help keep your pavers in place.
That's it - now it's time to enjoy your beautifully paved outdoor area! If you need more advice on DIY paving, speak to our helpful Landscape Managers in-store. All the materials mentioned in this article are available at your local Flower Power Garden Centre.
Your DIY paving shopping list
Tools
- wheelbarrow
- shovel
- string line and pegs
- trowels
- spirit level
- rubber mallet
- screed rail
- rake
- broom
- brick bolster, brick saw or angle grinder with diamond masonry blade (if cuts required)
Materials
- road base
- river sand
- gap sand
- pavers
- brickie's sand and cement (used to make the mortar for the haunch)
Help is at hand!
Don't forget, we're here to help! Drop in to your local Flower Power Garden Centre and chat to our friendly landscaping team for their top tips on DIY paving. Not brave enough to pave yourself? Let our Flower Power Garden Care team do it for you. Learn more.